You can check spelling and grammar in Word using built-in proofing tools that flag mistakes, confused words, and style issues as you type — no third-party software needed. If you write a lot, pairing this with clean formatting like justified text in Word gives you a genuinely professional document.
In this guide, you’ll learn how to enable proofing, set the correct language, review corrections through the Editor, and fix Word when it isn’t detecting errors at all.
Why Check Spelling and Grammar in Word?
Word’s proofing tools catch mistakes before you share or print, which keeps your writing professional. This works in Word 2016, 2019, 2021, and Microsoft 365.
They can detect:
- Spelling mistakes
- Grammar errors
- Frequently confused words
- Repeated words
- Writing style suggestions
Watch the Video Tutorial
If you prefer to see this in action, the full video walkthrough is below, showing each method step by step.
How to Check Spelling and Grammar in Word: Step-by-Step
Four steps: turn proofing on, set the right language, read the underlines, and run the Editor for a full pass.
Step 1: How to Check Spelling and Grammar in Word by Enabling Proofing
If Word isn’t highlighting errors, proofing is probably switched off.
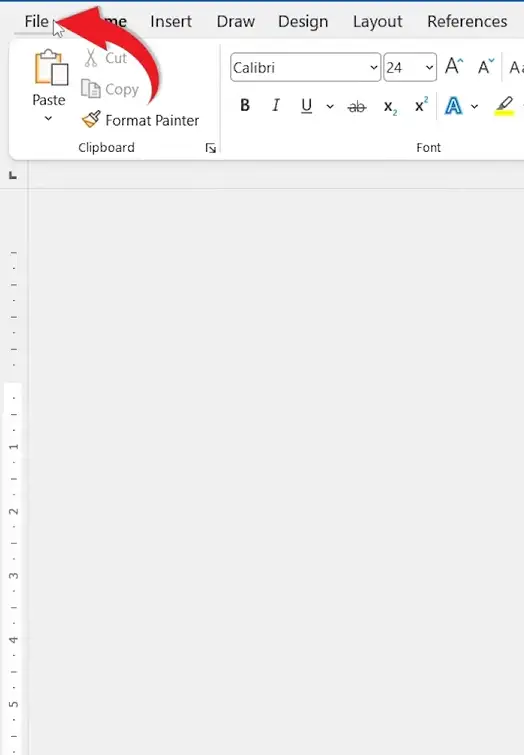
- Click the File tab.
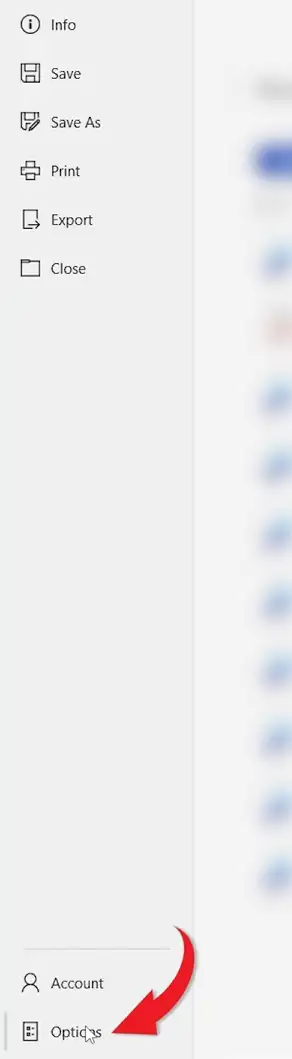
- Select Options.
- Click Proofing.

Under When correcting spelling and grammar in Word, tick:
- Check spelling as you type
- Mark grammar errors as you type
- Frequently confused words
? Click OK. Word starts flagging errors as you type.
Step 2: How to Check Spelling and Grammar in Word by Setting the Language
A common reason Word misses errors is the wrong proofing language.
- Go to the Review tab.
- Click Language.
- Select Set Proofing Language.
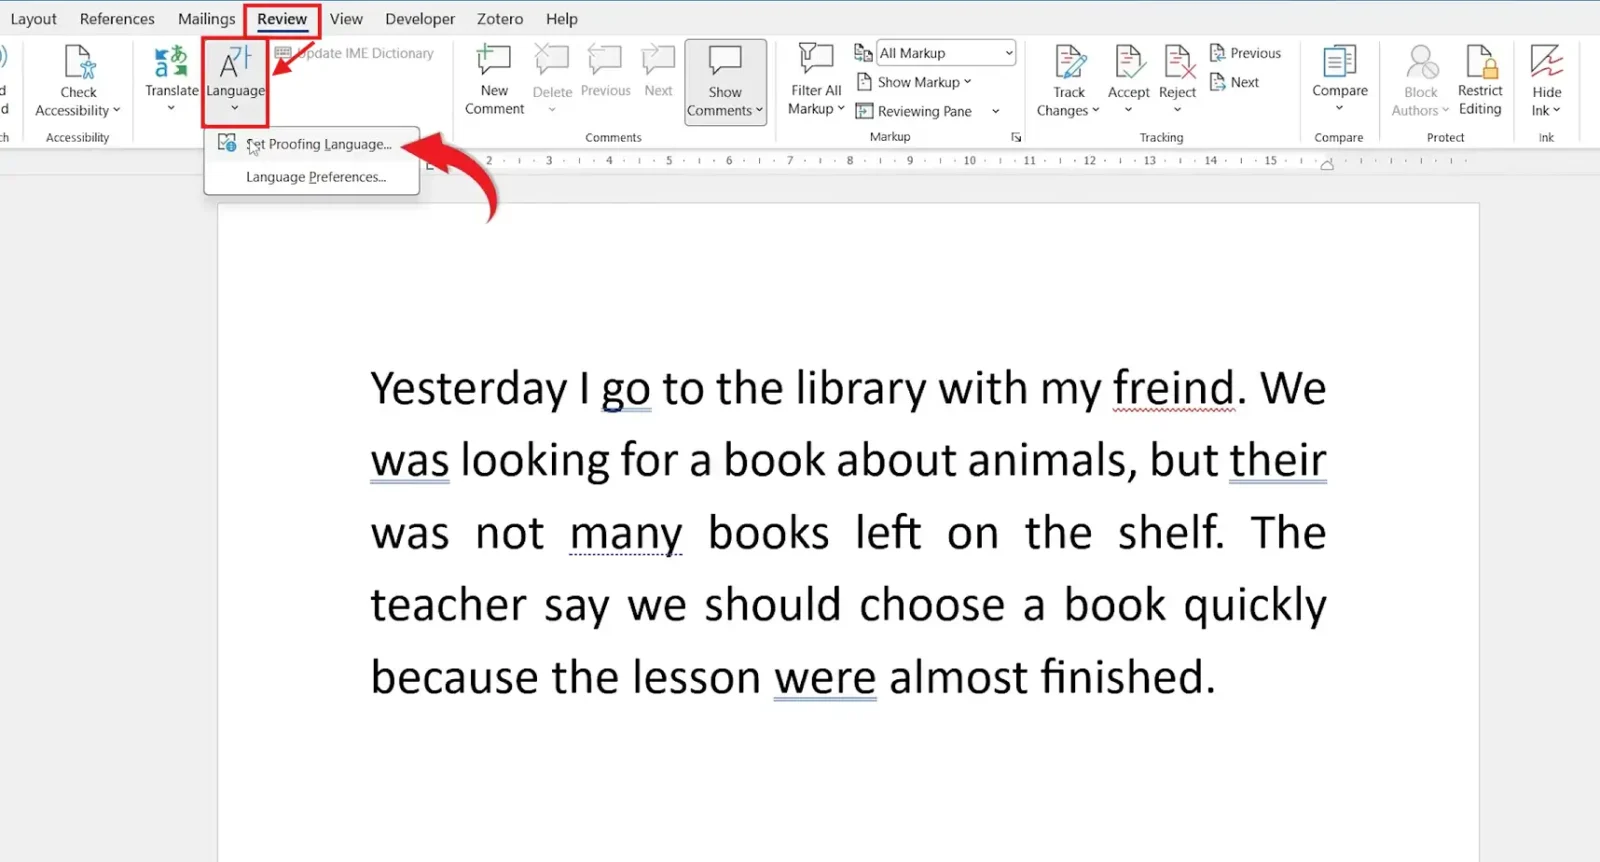
Choose the language that matches your writing — for example English (United Kingdom), English (United States), or English (Australia).
- Make sure Do not check spelling or grammar is unchecked.
- Click Set As Default if you always write in this language, then OK.
? Word now proofs against the correct dictionary.
Step 3: How to Check Spelling and Grammar in Word by Reading the Underlines
Word uses coloured underlines to flag issues as you write.
- Red underline — a possible spelling mistake.
- Blue underline — a grammar issue or writing suggestion.
To fix one:
- Right-click the underlined word.
- Choose the correct suggestion, or select Add to Dictionary / Ignore.
? Add to Dictionary is ideal for names, technical terms, and industry vocabulary Word doesn’t recognise.
Step 4: How to Check Spelling and Grammar in Word Using the Editor
To review everything in one pass instead of word by word:
- Go to the Review tab.
- Click Spelling & Grammar (or Editor, depending on your version).
- For each item, choose Accept, Ignore, or move to the next.
? The Editor pane lists every detected issue — the best way to review a full document before sharing or printing.
Which Method Should You Use?
| Approach | Best for |
|---|---|
| Coloured underlines | Fixing errors live as you type |
| Right-click a word | Quick single corrections |
| Editor / Spelling & Grammar pane | A full document review before sending |
Common Problems When Checking Spelling and Grammar in Word
Word isn’t detecting any errors
Confirm both boxes are ticked in File ? Options ? Proofing, then save, close, and reopen the document to refresh the settings.
“Do not check spelling or grammar” is turned on
Select all text (Ctrl + A), open Review ? Language ? Set Proofing Language, and untick that box — it’s often applied to a template or pasted text.
The wrong language is flagging correct words
Set the proofing language to match your writing and click Set As Default so new documents inherit it.
Word ignores acronyms and URLs
In Proofing, untick Ignore words in UPPERCASE and Ignore internet and file addresses if you want those checked too.
Pro Tips for Cleaner Proofing
- Build a custom dictionary for recurring names and jargon so they stop being flagged.
- Proof faster with shortcuts — press F7 to open the Editor, and keep the Microsoft Word keyboard shortcuts cheat sheet nearby for the rest.
- Do a final visual pass with formatting marks on so stray spaces don’t slip through.
FAQs
How do I check spelling and grammar in Word?
To check spelling and grammar in Word, enable proofing in File ? Options ? Proofing, then use the coloured underlines or the Review ? Spelling & Grammar Editor.
Why isn’t Word checking my spelling?
Make sure Check spelling as you type is enabled in File ? Options ? Proofing and the proofing language is correct.
Why aren’t grammar mistakes showing?
Enable Mark grammar errors as you type and confirm Do not check spelling or grammar is unticked for the text.
What do the red and blue underlines mean?
A red underline flags a spelling error; a blue underline flags a grammar issue or writing suggestion.
What is the shortcut to check spelling in Word?
Press F7 to open the Spelling & Grammar Editor and step through every issue in the document.
How do I change the proofing language?
Go to Review ? Language ? Set Proofing Language, pick your language, and click OK.
Can I add words to the dictionary?
Yes. Right-click the underlined word and choose Add to Dictionary if it’s spelled correctly but not recognised.
Conclusion
You can now check spelling and grammar in Word by enabling proofing, setting the right language, reading the underlines, and running the Editor for a full pass.
With clean copy in place, finish the job with tidy layout — for example, learn how to align text in Word so your polished writing looks the part on the page.
Related Tutorials

Recent Microsoft Word Tutorials

Looking for more help with Microsoft Word? Browse all step-by-step Word tutorials covering formatting, layout, pages, and document setup.
? View all Microsoft Word tutorials: https://wordmadeeasy.halmanweb.com/microsoft-word/
? Need more support – check out the official guidance: https://support.microsoft.com/en-au

Prefer watching instead of reading? Many Word tutorials are also available as short, step-by-step videos on the Word Made Easy YouTube channel.